

These easy kid-friendly craft projects - including this spooky Halloween bat bunting - are fun for all the family.
If you don't fancy going trick-or-treating with your little ones this Halloween, spend the evening getting creative instead with these ghoulish ideas and scary decorations.
From spooky-faced drinking bottles fit for any Halloween party, to creepy lanterns to guide trick-or-treaters to your door, there's a craft project for every frightening occasion.
How to make spooky Halloween lanterns

You will need:
- Glass jars
- Black card
- LED tealights
- PVA glue
- Glue brush
- Scissors
1. Cut out some Halloween shapes from the black card and glue to the inside of the glass jar using some PVA glue and a glue brush.
2. Tear the orange tissue paper into small squares. Using a small amount of glue, begin to layer the pieces of tissue over the top of the black card motif. Gradually build up the tissue paper until the whole inside of the jar is covered.
3. Allow the glue to dry completely overnight and then use a couple of LED tealights in each lantern to light the path to your front door.
How to make bewitching bottles

You will need:
- Glass milk bottles
- Black sticky-back plastic
- Pencil
- Scissors
1. Using our image as a guide, draw some facial feature shapes on the paper side of the black plastic.
2. Cut out the shapes and cut in details like cat’s eyes to the middle of the circles. Arrange and stick onto the milk bottles.
3. Fill with orange juice to look like pumpkins or milk to look like ghastly ghosts!
How to make Halloween bat bunting

You will need:
- Orange, green and purple yarn
- Pompom maker
- Pencil
- Black card
- Matching ribbon
- Wiggle eyes
- Scissors
1. Wind the yarn around the pompom maker to create a large fluffy ball. Trim any uneven strands, making sure to leave the two long pieces of yarn for hanging.
2. Cut two batwing shapes and two small triangles from the black card. Using a hot glue gun, stick the wings and ears in place.
3. Stick two wiggle eyes to the front of the bat pompom.
4. Tie a bow in the long pieces of yarn and string each bat onto a branch or piece of long ribbon to create a garland.
-
 I tested the Lakeland Dual Basket air fryer and it made midweek family cooking a breeze
You can’t go wrong with the dual basket air fryer by Lakeland complete with easy-view windows to ensure burnt food is a thing of the past…
-
 Reframing one simple habit could get your sex life back on track after having a baby, new research shows
Many parents struggle to get their sex life back on track after having a baby, but new research has shown how one simple habit could make all the difference.


-
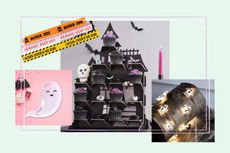 Best Halloween decorations 2022
The best Halloween decorations for a fun family night at home with the kids that won't send them to bed with nightmares
-
 Why do we celebrate Halloween in the UK? Origins and meanings of the spooky tradition
To celebrate Halloween, it's time to carve those pumpkins and dig out the spooky costumes - but where do these traditions come from?
-
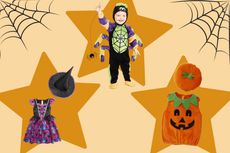 20 of the best Halloween costumes for kids 2022
Our pick of the best Halloween costumes for kids in 2022, from adorable baby pumpkins to mischievous minions...
-
 50 best Halloween couple costume ideas to steal for 2023
File under this under: Halloween but make it fashion.
-
 29 best Halloween games for kids of all ages - tried, tested and recommended by families
Trick or treat! Gather round the bubbling cauldron and play these treacherous Halloween games to summon fun and fright into your haunted night
-
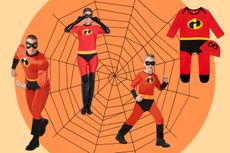 15 Best family Halloween costumes and ideas for 2022
If you're looking for the best family Halloween costumes this spooky season, then this roundup is sure to give you some inspiration
-
 Halloween party ideas: 20 easy ways to nail a spooky celebration
For Halloween party ideas look no further; we've found the best Halloween decorations, budget fancy dress and yummy Halloween ideas for recipes
-
 Halloween door decorations - seriously spooky ideas for monster doors


