How to knit a scarf
Follow this simple knitting pattern and create this colourful accessory that'll keep the kids warm all winter...

Keep the little ones warm this winter and learn how to knit a scarf with this stripy scarf knitting patterm. This scarf is colourful, fun and simple to make.
Just follow our 'how to knit a scarf' guidelines below. Using slipped stitches or Chain selvedge will create a neat and professional-looking edge to the scarf.
Don't miss our gallery of 17 more free knitting patterns for you to get started on!
How to knit a scarf
Scarf measurements:
Size: 180cm (71in) or desired length
Scarf materials you'll need:
- Rowan Pure Wool DK yarn: 100g raspberry (A), 150g hyacinth (B), 50g geranium (C), 100g dahlia (D), 50g damson (E).
- 1 pair of 4mm (US6:UK8) needles (A),1 pair of 3.25mm (US3: UK10) needles (B).
Tension:
22 stiches x 30 rows measure 4in (10cm) square over stocking-stitch using 4mm needles
Knitting pattern abbreviations:
Alt = alternate Beg = beginning CM = centimetres MM = millimetres Cont = continue Dec = decrease Foll = following K = knit K2tog = knit two stitches together: if these are the very last in the row, then work together through back of loops M1 = make one stitch: pick up horizontal loop between the needles and work into the back of it P = purl Rep = repeat Rem = remaining St(s)= stitch(es) Stocking-stitch = knit on the right side, purl on the wrong side
Scarf knitting pattern
Follow the scarf knitting pattern below to make this stripy scarf:
GoodtoKnow Newsletter
Parenting advice, hot topics, best buys and family finance tips delivered straight to your inbox.
For the stripy scarf:
Using 3.25mm (UK10/US3) needles and yarn A, cast on 50sts. Change to 4mm (UK8/US6) needles and continue as follows:
Row 1 (RS): S1p, p1, [k1,p1] to the end.
Row 2: S1p, p1, [k1,p1] to the end.
These 2 rows form a 1 x 1 rib with a slipped stitch at the beginning of each row. Repeat these 2 rows six times more (14 rows worked in total), ending with a WS row. Join in yarn B using a slipknot. Work in 14-row stripes of rib in the following colour sequence: C, B, A, D, E, D, A, B. Repeat four times. To finish stripe sequence, work 14-row stripes in colour C, B, then A. Cast off in rib. Cut yarn B (or your choice of yarn) into lengths approximately 22cm (9in) long. Affix these as fringe along each end of the scarf using the following instructions:
For the scarf fringe:
- Cut a card template a little wider than the fringe length. Wind yarn repeatedly around the card. Cut along one side of the card, making lengths of yarn double the width of the card.
- Take several lengths (more make a thicker fringe), fold in half and hold the folded loop in front of fabric edge. Insert a crochet hook through back of fabric close to the edge or through the purpose-made selvedge holes. Catch the folded loop and pull it through to back.
- Catch strands in the hook again and pull through the first loop. Repeat along the edge, spacing as required. Trim ends evenly. Fringes can be beaded, knotted, or worked in silky or contrast coloured yarns.
Darn the ends to finish the scarf off:
Darn ends up the side of the scarf to prevent unsightly ridges forming. The stripes will remain cleanly divided, without uneven lines or puckering.
This scarf knitting pattern is taken from The Knitting Book by Frederica Patmore and Vikki Haffenden, published by Dorling Kindersley Publishers Ltd.
-
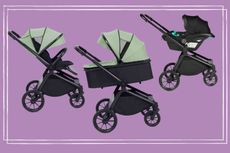 What is a travel system? Baby gear experts explain how they work - and what’s included
Experts decode what is a travel system and offer tips on how to find the best one for you
By Charlotte Duck Published
-
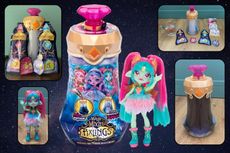 Magic Mixies Pixlings are a bestseller - but are they worth the money? We put this toy through its paces to find out
Magic by name and magic by nature? We review Magic Mixies Pixlings to see if it lives up to the hype
By Sarah Handley Published

