


20cm (8in) round fruit cake - see our recipe for cranberry and apricot cake 4-6 level tbsp apricot glaze or sieved apricot jam 600-750g (1¼-750g) marzipan 1-1.25kg (2-2¾ lb) white sugarpaste 150-200g (5-7oz) red sugarpaste ½ x 500g packet of royal icing sugar green and yellow paste food colouring 60-90g (2-3oz) green sugarpaste 2-3 teaspoons CMC (also known as Tylose or Tylopur) 1.5cm, 3cm and 3.5cm (¾in, 1¼in and 1½in) round cutters or plain piping tubes Foil 2 calyx cutters (different sizes) Mini muffin tray PME plunger holly leaf cutters Small disposable piping bags PME no. 1.5 or 2 plain piping tube Patchwork cutters "Christmas Greetings" cutters
1. If the cake has risen in the centre and is not level, trim the top to level it then upturn the cake and place it centrally on the cake drum. Warm the apricot glaze or jam until it's just boiling and spread it over the top and sides of the cake using a palette knife.
2. Knead the marzipan to soften it and roll it out on a surface lightly dusted with icing sugar so that it's large enough to cover the top and sides of the cake. Lift the marzipan over the cake, and then press it down on the top.
3. For square cakes, ease in the fullness at the corners, for round cakes, ease in the fullness all the way around the cake and press the marzipan firmly against the sides.
4. Trim away the excess marzipan around the base of the cake, keeping any trimmings well wrapped in a freezer bag so they can be reused for another cake. Rub the surface of the marzipan smooth using an icing smoother or a plastic sidescraper.
5. Knead the sugarpaste to soften it and then roll it out so it's large enough to cover the top and sides of the cake, and also the top of the cake drum. Brush water over the marzipan and the top of the cake drum and then lift the sugarpaste over the cake and press it down on the top of the cake, then the sides, then the top of the cake drum, ensuring that no air is trapped under the sugarpaste. Trim away the excess around the edge of the cake drum.
6. Roll out some of the red sugarpaste thinly and cut out various size circles. Brush a little water onto the back of the circles and stick them around the cake.
7. Make up the royal icing following the directions on the packet and colour some of it green using the paste food colouring. Keep the icing covered with a damp cloth all the time it's not being used. Cut off the end of a piping bag and insert the piping tube and then fill the piping bag with green icing. Pipe a "snailstrail" pattern around the red dots.
A "snailstrail" is piping a dot and then stopping the pressure and pulling the piping bag to one side, then squeezing the bag again to pipe another dot, and then stopping the pressure and taking the icing bag a bit further on, so you end up with a series of beads, all about the same size. Pipe some swirls of dots, in decreasing sizes to give some more pattern.
8. To make the poinsettias, make some small cup shapes from the foil as formers for the flowers. Add a small amount of the CMC to some of the red sugarpaste knead it in well.
9. Roll the sugarpaste out thinly on a surface lightly dusted with icing sugar and use the calyx cutters to cut out some of the larger calyx shapes and rest them in the cupped foil. Cut out some of the smaller calyx shapes. Brush a little water into the centre of the flowers in the cups and then place the smaller layer on top, alternating the points with the first layer. Only 1 flower is needed, but it's recommended to make several in case any brake. Leave the flowers to dry overnight.
10. Colour some of the royal icing yellow and fill a piping bag fitted with the plain piping tube and pipe yellow dots in the centres of the poinsettias, pulling the piping tube up so the dots are pointed. Leave the flowers to dry.
11. For the inscription, roll thinly some of the red sugarpaste with the CMC added to it and cut out the inscription. Use a small palette knife to lift the letters up. Brush a little water onto the back of the letters and stick them in place on the top of the cake. Stick the poinsettia and holly leaves on the top of the cake, using a little white royal icing to secure them in place. Roll some red balls of sugarpaste (with or without the CMC) and stick them onto the top of the cake as holly berries.
-
 Staying together 'for the kids' can have damaging consequences - divorce therapist explains 3 reasons why
Three major consequences of staying in a failing relationship have been identified - we share what they are, and why staying together can be more damaging for your children.
-
 Record number of families opt-out of claiming child benefit, but the decision could have serious repercussions for your future
Stark warning for families as number of parents who opt-out of receiving child benefit reaches 10-year high


-
 6 surprising ways I’ll be using my Christmas leftovers this year - and #3 is spot on for Boxing Day
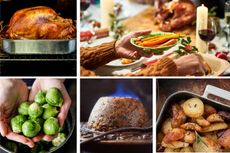
I'm a Food Writer, and this is how I make the most of my Christmas leftovers, from excess turkey to cold veggies...
-
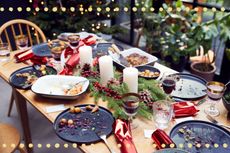
 What time should Christmas dinner be served? A step-by-step guide to Christmas dinner timings
A handy guide to Christmas dinner timings for a stress-free festive meal, including when to cook the turkey and what can be done the day before
-
 Gingerbread cuckoo clock
A festive project that doubles as a decoration with the ultimate wow factor!
-
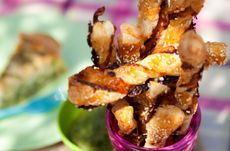 Cheese and pickle straws
This cheese and pickle straws takes a simple party staple and ramps it up a level by adding a twist of tangy pickle to the mix.
-
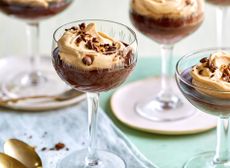 Espresso Martini chocolate pots
Whizz these Espresso Martini chocolate pots up in 10 minutes for your dinner party – a perfect, lightly boozy dessert...
-
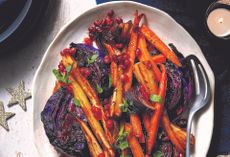 Roast red cabbage, carrots and parsnips with cranberry glaze
Our cranberry glaze adds gloss and sweetness and elevates roast veg to something truly special...
-
 Where is eggnog from? The history of the festive drink explained
Find out where is eggnog from, as we delve into the history of the festive drink
-
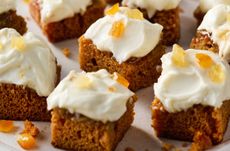 Mini gingerbread cakes
It takes just 10 mins to make mini gingerbread cakes. Jazz up a shop-bought cake with frosting, candied peel, and ginger for a delectable nibble...


