Cupcake towers
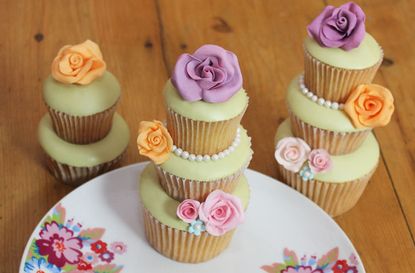

Mini cupcake towers made with three different-sized cupcakes - muffin, cupcake and mini, these cupcake towers are easy to make and would be the perfect food gift for someone special.
This recipe shows you how to make modelling paste roses too, which can be used to decorate other cakes.
Ingredients
- 1x batch of basic cupcakes
- 1x batch of basic buttercream
- Jam (optional)
- 150g white fondant
- Sugarflair Gooseberry food colour paste
- 50g modelling paste
- Various colours for the roses (Victoria used Sugarflair’s tangerine, baby Pink, baby blue and aubergine
- rose petal dust for shadowing the roses
- Sugar pearls
- Cornflour for dusting
- Royal icing sugar with a few drops of water (for glueing if you prefer)
Step 1
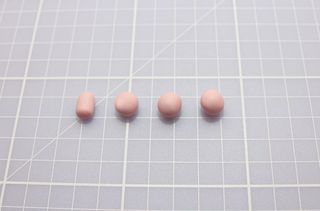
Start by making the roses. They don’t take too long to dry as the paste is very thin but leaving them overnight is better. Make sure you air dry them, don’t be tempted to put them in an airtight box or they will go soggy.
Modelling paste is essential for these flowers. These roses can’t be made from fondant unless you have added gum tragacanth to stabilise it. Victoria uses 1tsp to 250g of fondant.
To colour your fondant and paste, use a dot of colour on the end of a cocktail stick and work your way up to the colour you want gradually. You can add more but remember you can’t take it out once it’s in there. To make the smaller roses, roll one tiny sausage and three little balls of paste.
Step 2
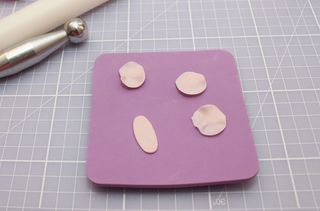
Using your rolling pin, roll the sausage shape and the balls of paste quite thinly - the thinner they are, the more realistic they look. Using the ball tool, thin the edges of the circles. If anything sticks dust the paste and the balling tool with a little cornflour.
Step 3

Roll the strip from one end to the other to create the centre of the rose.
Step 4
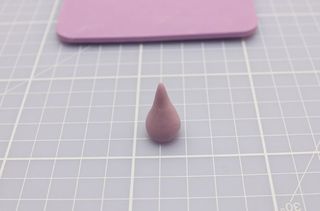
For the larger roses, you’ll need to create a cone shape first.
Step 5
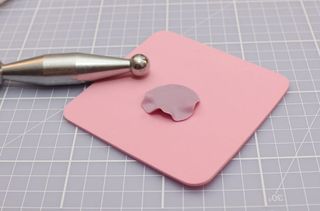
For the petals, roll small balls of paste and then roll them flat with the rolling pin. Thin the petals as before with the ball tool.
GoodtoKnow Newsletter
Parenting advice, hot topics, best buys and family finance tips delivered straight to your inbox.
Step 6
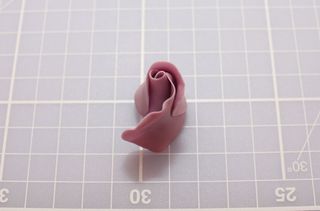
Wrap the first thinned petal around the cone to create the centre of the rose and continue to make more petals in the same way.
Step 7
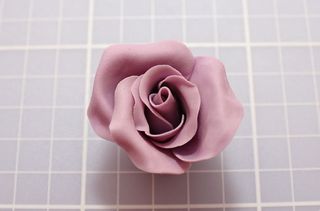
When wrapping the new petals around, tuck it under the previous petal so they overlap and keep going. Stop at 8 petals but you can add more if you wish. Leave them to dry on a flower forming drying sponge overnight.
Step 8
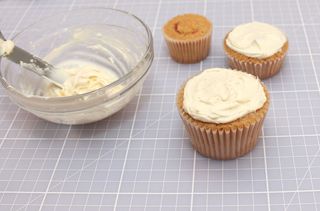
The next day make the cake batter and divide it between the cake cases. Once the cakes are cooled, you can add jam to the centre of the cakes by using an apple corer to core the centre and then adding jam to the hole replacing the cored piece once you’re finished.
Spread a little buttercream onto the tops of the cakes, not too much and not right up to the paper or it will squish over the paper when you add the fondant.
Step 9

When the roses are dry and are ready to be popped onto your cakes, add a little petal dust just to shadow and shade your flowers.
Step 10
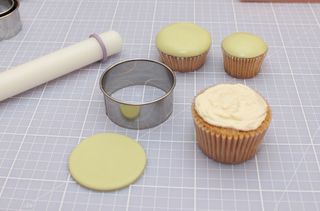
Roll the fondant to 4mm thick and cut circles to match the sizes of the cupcakes. Place the discs onto the buttercream and smooth the edges with the tips of your fingers.
Step 11
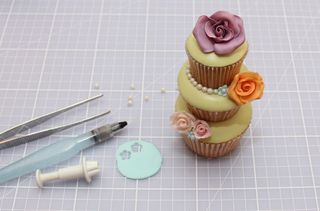
Using the water pen, stick the roses and pearls and small blossoms onto the stacked cupcakes to decorate. You need to really rub the brush onto the fondant to make it sticky before you add the flowers on or they will just drop off. You could use a dot of royal icing too if you wish.
Step 12
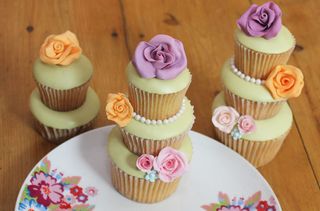
Your cupcakes are now ready to serve.
Trusted, informative, and empathetic – GoodToKnow is the ultimate online destination for mums. Established in 2007, our 15-year-strong archive of content includes more than 18,000 articles, 1,500 how-to videos, and 7,000 recipes.