

This selection of gardening crafts will turn any keen crafter into a green-fingered gardener this spring.
With more of us spending time in our gardens than ever before, there's no better time to get stuck into some gardening crafts. This list will take you through some of the basic things you can make to help you out in the garden, like a tool-kit caddy or creative plant labels.
So whether you've got a huge back garden or a small space on a balcony, it's all about what you do with it. So get adventurous and try out some of these fun gardening crafts. Kids might need a little supervision with cutting and sewing, depending on their age, some of these crafts - or you might want to join in the activity with them.
There's plenty of them that you can actually do outdoors as well, bringing garden crafts into the garden!
Looking to make the most of your garden this summer? We've got a great list of outdoor toys that are perfect for when the weather gets warmer, and lots of gardening tips to help you turn your garden into a leafy paradise.
Check out these fun gardening crafts...
Most of these can be made with materials bought online, or ones that you're likely to already have in your crafting box.
Tool-kit caddy

No horticulturalist should be without a place to keep and organise all those little accessories that are essential for their hobby. This easy-to-make caddy is the perfect size to carry around the garden, too.
To make this tool-kit caddy you will need:
- Wooden caddy
- Sandpaper
- Paint in grey and white
- Paintbrushes
- Clear finishing wax
- Buffing cloth
- Alphabet stencil
- Spray paint for metal
- Jute ribbon
How to make this tool-kit caddy:
- Lightly sand down and wipe the dust away from all the surfaces of the wooden caddy.
- Apply two coats of grey paint, following the manufacturer’s instructions and allow to dry completely.
- Tape a letter stencil in place with masking tape and apply the white paint with even brush strokes, allow to completely dry before buffing with clear, soft wax over the top.
- Clean and dry some food tin cans – we used 400g size. Sand down the sharp lip edge of the opening with sandpaper. Spray with a couple of coats of metal spray paint in greens and greys. Allow to dry.
- Glue ribbon around the top outer edge of the cans to add a decorative finish.
Time to make: 4 hours (not including drying time)
Style tip: Spray the cans with different colours to indicate assorted uses for each.
Gardener’s pinny

Nowhere to put anything when you’re gardening? Make yourself this indispensable little pocketed apron.
To make this gardener's pinny you will need:
- An old pair of jeans
- Scissors
- Sewing machine
- Matching thread
- 20 x 150cm contrasting fabric
How to make this gardener's pinny:
- Cut the back out of the jeans, snipping tightly along the inside of the side seams, under the pockets and under the waist band.
- Turn and pin under the bottom and side edges of the fabric by 1cm seam and topstitch in place.
- Cut the contrasting fabric into 10cm wide strips. To make the waistband, fold one of the strips in half widthways with wrong sides together. Sew together along both of the long sides at 5mm from the edge. Pull at the threads on the raw edge to create a frayed look.
- Position in the centre of the denim apron and topstitch in place.
- Repeat for the other strip and trim down to the width of your apron. Pin to the underside of the bottom edge and topstitch in place.
Time to make: 2 hours
Style tip: Selvedge edged ribbons can be used instead of fabric, if you have some in your sewing stash.
Upcycled plant labels

Use vintage spoons as decorative plant labels for a herb patch or allotment plot.
To make these plant labels you will need:
- Vintage metal spoons
- Image transfer medium
- Paintbrush
How to make these plant labels:
- Print out assorted herb names, sized to fit the spoons, leaving about 0.5cm around each word.
- To transfer the names on to the spoon use a transfer medium and, following the manufacturer’s instructions, apply three thin coats on top of each name to create a clear, plastic-like film.
- When dry, remove the original backing paper from under the names by soaking in water and rubbing off the back. Allow to dry.
- Position and glue onto the spoons with the transfer medium with the names facing the right way up, sealing with a further coat once placed correctly. Allow to dry over night before positioning in your herb pots.
Time to make: 1 hour
Style tip: Print out miniature plant illustrations, too, to add a little decoration to the spoons.
There's no time like the present! Get cracking on these gardening crafts, they're fun for the whole family and are sure to keep you busy over the weekend.
-
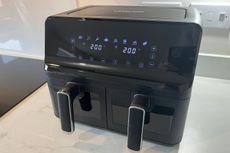 I tested the Lakeland Dual Basket air fryer and it made midweek family cooking a breeze
You can’t go wrong with the dual basket air fryer by Lakeland complete with easy-view windows to ensure burnt food is a thing of the past…
-
 Reframing one simple habit could get your sex life back on track after having a baby, new research shows
Many parents struggle to get their sex life back on track after having a baby, but new research has shown how one simple habit could make all the difference.

