Have a go at patchwork
Sew this handy pincushion following our step-by-step guide to this English paper piecing technique
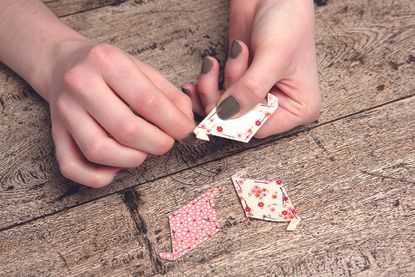

Sew this handy pincushion following our step-by-step guide to this English paper piecing technique
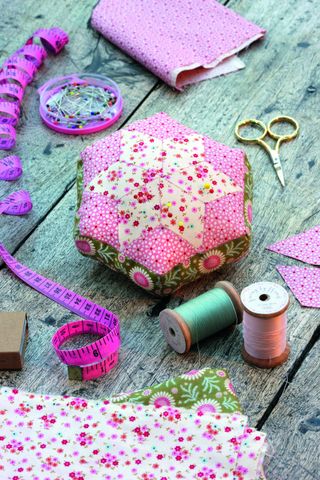
To make this pin cushion you will need:
- Three patterned and one plain cotton fat quarters
- Paper and pencil
- Rotary cutter
- Cutting mat
- Quilter’s ruler
- Binding clips or pins
- Sewing thread
- Hand sewing needle
- Scissors
- Stuffing
Stockists: Pollen pink, sunflower green and Tilly red cotton fabric fat quarters, from £4 each, Tilda (tildasworld.com). Polyester stuffing, from £3.99, Minerva Crafts (minervacrafts.com)
How to make this pin cushion:
The template you will need: Have-a-go-at-patchwork-templates.pdf
1. Enlarge the templates, so the long side of the rectangle measures 2¾ inches. Cut out 12 diamond templates, six rectangle templates and one hexagon templates from paper.
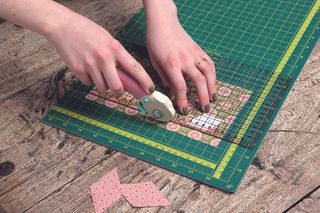
2. Using the rotary cutter and quilter’s ruler, position six diamond paper templates on one patterned fabric. Cut around the edge of each template at a quarter of an inch. Repeat with the rest of the templates, making sure to use a different patterned fabric for the other six diamond templates.
3. Finger press the fabric over the edges of the paper template and hold securely in place with a binding clip. With a hand sewing needle and contrasting thread, tack all the way around the edge, holding the fabric in position. Remove the binding clip.
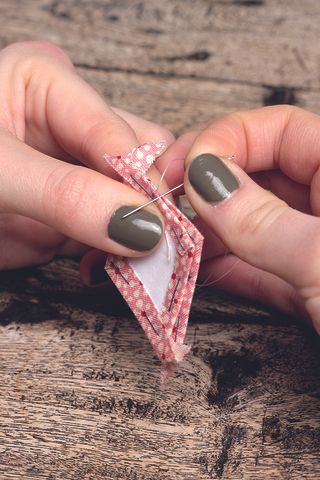
4. Position two patchwork diamonds of fabric right sides together and over sew the pair together along one edge. Take even diagonal stitches over the edge, keeping the stitches as close to the folded edge of the fabric as possible, without sewing the paper template.
GoodtoKnow Newsletter
Parenting advice, hot topics, best buys and family finance tips delivered straight to your inbox.
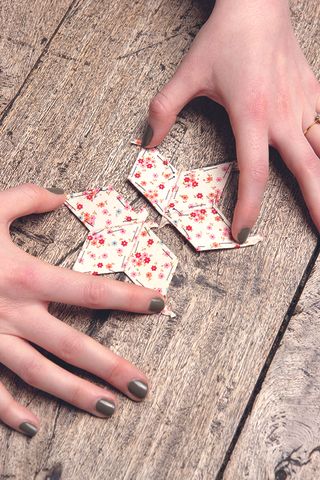
5. Continue stitching, creating two sets of three diamonds, then join these two sets together along the one long straight edge.
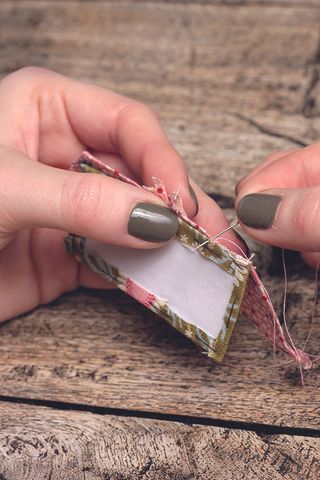
6. Once all six central diamonds have been sewn, over sew the outer edge of diamonds to the centre ones. Then over sew two outer diamond edges to one long edge of a rectangle, using our image as a guide. Repeat for all the rectangles, then join the rectangles together along the short edges.
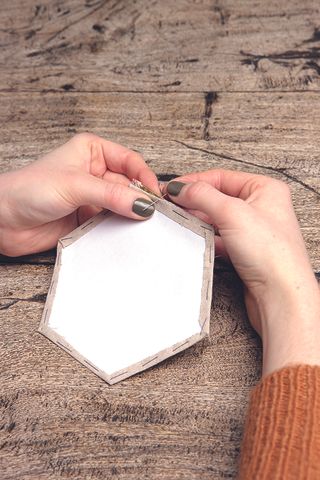
7. Taking the large hexagon patch that will become the base of the pincushion, begin over sewing the remaining long edges of the fabric rectangles to the sides of the hexagon. Make sure to leave one side of the pincushion open for adding the stuffing.
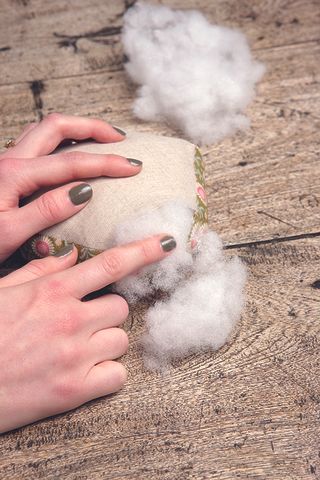
8. Undo all of the tacking stitches from the pincushion patches and carefully remove the paper templates. Turn the pincushion right sides out and press. Fill the pincushion with stuffing until it’s firm and then slipstitch the gap closed, using matching thread.

Esme is Future's resident craft expert, working across titles such as GoodTo, Woman&Home, Woman’s Weekly, Woman, Woman’s Own, Chat, Now, Pick Me Up and The Craft Network. Successfully turning her sewing hobby into a career, she's adept in a number of crafts, including sewing, papercraft, calligraphy, embroidery and printing.
-
 Worried about your teen 'being smelly'? They can't help it, according to scientists, and help is on its way to ease the problem
We know that puberty can cause all sorts of smells to emanate from teens - now scientists have revealed exactly what you're smelling, and how evolution contributed.
By Lucy Wigley Published
-
 Parenting coach shares 4 'powerful' reframes to try next time it feels like your kid is pushing all your buttons (and #4 is a game changer)
A parenting coach has shared four ways parents can reframe their thoughts when their kid has big emotions. Giving them a try could offer big results in little time.
By Lucy Wigley Published