
Bright and bold, this fiesta-style embroidered tote bag is perfect for shopping in the sunshine! Learn how to embroider your own tote bag with this handy guide.
Looking to learn how to embroider your own tote bag? Frida Kahlo fans will love this brightly coloured bird embroidered bag, perfect for a trip to the shops or running around town on errands. For more indoor crafting ideas, why not check out our easy craft projects for beginners that will help you create striking pieces for your home?
How to embroider your own tote bag

To embroider your own tote bag, you will need:
- Pink cotton fabric
- Patterned fabric scraps
- Paper-backed fusible web
- Embroidery thread in yellow and green
- Embroidery needle
- Matching thread
- Scissors
- Pins
- Sewing machine
- Tracing paper
- Iron-on transfer pencil
- This bird embroidery template
Finished size: 32 x 38cm
How to embroider your own tote bag:
- For the bag front and back, cut out two rectangles, measuring 35 x 43cm. For the handles, cut out two strips measuring 8 x 50cm.
- Enlarge the template to fit the bag front. Using a piece of tracing paper and transfer pencil, copy the template onto the bag front, using an iron on a low heat setting.
- For the bird and leaf appliqués, transfer the two bird and leaf outlines onto the paper backing of the fusible web. Adhere to the backs of the patterned fabric scraps and cut out.
- Remove the paper backings and, using the transfer pencil lines as a guide, position the birds on the bag front. Fuse in place following the manufacturer’s instructions.
- Following the transfer pencil lines, embroider over the markings. Use our photo as a guide for what colours to use. For the bird outlines, tree trunk and twigs, use stem stitch. For the sun, leaves and bird details, use backstitch. Add French knots to the tail ends on the bird.
- Once stitched, press the bag front to smooth out any creases. Pin the bag pieces right sides together with edges aligned. Sew all the way around the edge with a 1.5cm seam allowance, making sure to leave the top edge open.
- Turn the top edge of the bag under by 1.5cm and then a further 2.5cm. Stitch in place as close to the folded edge as possible.
- To make the handles, turn the long sides under by 1cm on both strips. Fold the strips in half lengthways and pin. Topstitch along the folded edge.
- Measure 10cm in from either side of the bag and use a pin to mark these measurements. Pin the ends of each handle to the inside of the bag at these markings, making sure the handles are at least 3cm inside the bag. Secure in place by topstitching a robust crossed square at all the handle ends.
Stitch guide
Stem stitch
Working from left to right, bring the needle up at the end of the line and make a short stitch. Bringing the needle up again, adjacent to the first stitch and halfway down its length, make another short stitch. Repeat to form a line.

Backstitch
Bring the needle up through the fabric about 3mm in front of the first stitch, working backwards insert the needle to create the stitch. Bring the needle forward under the fabric to emerge 3mm ahead of the first stitch, ready to make the next. Repeat to create a line of backstitches.

French knot
Bring the needle through from the back of the fabric to the front, wrap the thread three times around the needle and, holding the wraps with your thumb, reinsert the needle at the same point and pull through. The wraps will form a knot on the surface of the fabric.

-
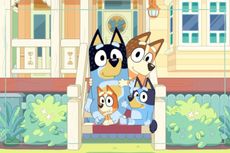 Who did Bluey have a baby with? Fan theories are running wild following the cartoon’s season 3 finale (our money is on Mackenzie)
The 'Surprise!’ episode has really done what it says on the tin - and many can’t get over the shock of Bluey having a baby
-
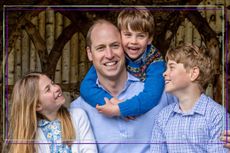 Prince George, Charlotte and Louis are huge fans of this popular tinned food - and it’s not what you’d expect from the royals
Royal meal times are more similar to the average family's than you might imagine

