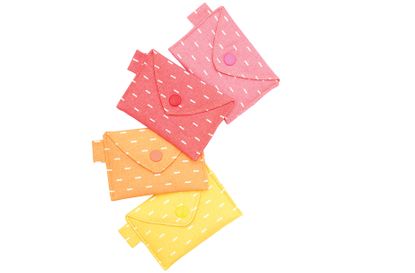
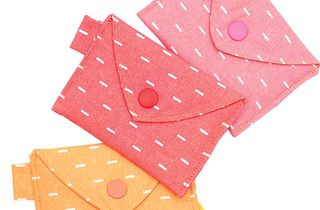
How to make a fabric purse
Perfect for your cards or coins, these purses are easy to spot in your shopping bag


Perfect for your cards or coins, these wallets are easy to spot in your bag
It's so easy to make these pretty fabric purses that they're the perfect beginner project. If you've just started experimenting with a sewing machine, making these fabric purses will have you stitching in no time. Using a straight stitch setting throughout, our fabric purse tutorial is so simple to follow that even little ones can have a go with adult supervision.
Plus, you can use up your stash of scrap fabrics leftover from other projects too. Once you've made one, you might as well sew up a whole set and give them to friends and families as gifts. Experiment with plains and prints, matching the snap fastenings to the dominant colour in the patterned fabric. Then, have a go at making a matching shopper, try sewing this embroidered tote bag or this simple cotton bag.
After you've mastered that, have a go at using up fabric remnants on this patchwork quilt.

To make a purse you will need:
- Paper, pencil, scissors and ruler
- Patterned cotton fat quarters
- 12 x 19cm thin fusible batting for each wallet
- Snap fastenings
- Bias tape maker
How to make a fabric purse:
1. Cut out two pieces of fabric measuring 11.5 x 19cm. Mark 6cm in along both long edges. Mark the centre of the nearest short edge and join the marks to create the triangle flap. Repeat on the other piece of fabric.
2. Cut a piece of batting 5mm smaller than the fabric and fuse to one of the pieces.
3. If you’d like a loop for a key ring, use the bias tape maker to create 5cm piece of tape. Fold in half and sew to one of the fabric pieces.
GoodtoKnow Newsletter
Parenting advice, hot topics, best buys and family finance tips delivered straight to your inbox.
4. With the fabric pieces right sides together, sew the edges with a 5mm seam allowance leaving a small gap for turning through.
5. Turn right sides out and press. Fold the bottom of the wallet up by 6.5cm and press. Stitch all the way around the edges leaving the bottom unstitched. Attach a snap fastening following the manufacturers instructions and snap closed.

Esme is Future's resident craft expert, working across titles such as GoodTo, Woman&Home, Woman’s Weekly, Woman, Woman’s Own, Chat, Now, Pick Me Up and The Craft Network. Successfully turning her sewing hobby into a career, she's adept in a number of crafts, including sewing, papercraft, calligraphy, embroidery and printing.
-
 Compromising may be killing your relationship - here are 5 ways to reach healthy compromises, according to relationship expert
Compromising isn't always the best way to keep the peace in a relationship
By Charlie Elizabeth Culverhouse Published
-
 Best interactive pets for kids: 15 gift ideas for children of all ages
From puppies to axolotls, take a look at our selection of the best interactive pets you can buy that are sure to be a hit with little animal lovers
By Sarah Handley Published