How to make terracotta jewellery
Learning how to make jewellery with terracotta air dry clay is so easy to do at home


Learning how to make jewellery with terracotta air dry clay is so easy to do at home
This fuss-free method of jewellery making is so simple to do with air-dry clay. We've made ours with a terracotta type of clay but you can opt for a white version or, once dry, choose to paint your jewellery in your favourite colours.
We love the matt look of this jewellery too but you can add a glaze-like varnish to give the jewellery a glossy finish.
Plus, you can play around with the shape and style of your jewellery. Don't fancy the geometric look? Be inspired by this rainbow and sunshine necklace and recreate this happy style in clay.
There are tons of things you can make with the leftover air-dry clay. Either keep it in an airtight container to last until your next project or have a go at these clay decorations.
You can get the kids involved too, by making a batch of salt dough to make the jewellery out of instead.
You will need:
- Terracotta air-dry clay
- Small and medium circle cookie cutter
- Gold-plated headpins, eye pins, jump ring, necklace chain, trigger clasp and long ball ear wires
- Craft knife and cutting mat
- Rolling pin
- Fine sandpaper
- Wire cutters
- Two pairs of round-nose pliers
For craft supplies, check out John Lewis & Partners
GoodtoKnow Newsletter
Parenting advice, hot topics, best buys and family finance tips delivered straight to your inbox.
How to make terracotta jewellery:

Step 1
On the cutting mat, roll out the terracotta air-dry clay to 3mm in thickness. Taking the cookie cutters, cut out four small circles and two medium circles from the clay.
For the circular earrings:
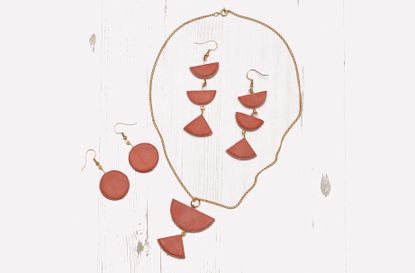
Leave two of the small circles whole and push a gold-plated headpin through the centre. Allow to dry.
For the drop earrings:
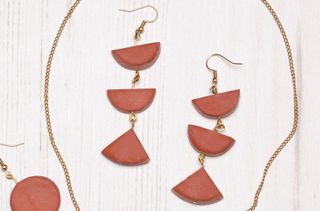
Cut the remaining two small circles in half and push eye pins through the centres. Cut a medium circle into quarters and thread two with headpins. Allow to dry.
For the necklace:
Cut the remaining medium circle in half and thread with an eye pin. Thread a quarter with a headpin and leave to dry.
Step 2
Once dry, remove the pins and sand down any rough edges and surfaces. Replace the pins, trim down the excess wire with the wire cutters and using the two pliers, twist the remaining wire into a loop.
Step 3
Using our photo as a guide, thread the loops of wire onto one another and squeeze the loops closed with the pliers.
Step 4
Add a jump ring to the top of the necklace, thread onto a gold-plated chain and finish with a trigger clasp and jump ring at the ends. For both sets of earrings, add long ball ear wires to the tops.

Esme is Future's resident craft expert, working across titles such as GoodTo, Woman&Home, Woman’s Weekly, Woman, Woman’s Own, Chat, Now, Pick Me Up and The Craft Network. Successfully turning her sewing hobby into a career, she's adept in a number of crafts, including sewing, papercraft, calligraphy, embroidery and printing.
-
 New research has linked video games to teen psychosis - here's what parents need to know
Teenagers who spend a lot of time playing video games are more likely to have a psychotic experience, according to a new study.
By Ellie Hutchings Published
-
 You might want to hold your tongue when watching your kids play sports - new study reveals the massive impact a parent’s sideline behaviour can have on children
When you're shouting from the sidelines, the words you say can hugely affect your child's approach to sport
By Charlie Elizabeth Culverhouse Published