Princess cake decoration
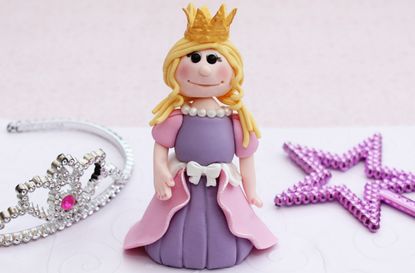
This gorgeous sugar princess would make any little girl happy with her pretty dress and sparkly gold crown.
With Victoria Threader's step-by-step guide, it's a lot easier than you might think to make. Change the hair and dress colours to make it look like whoever's birthday it is and they'll be delighted.
The recipe makes one, so simply increase quantities if you need more than one princess, you can never have too many after all!
Ingredients
- 40g purple modelling paste
- 20g skin tone modelling paste
- 5g white modelling paste
- 10g pink modelling paste
- 10g yellow modelling paste
- Black sugar pearls or sprinkles
- Sugar pearls or white ball sprinkles
- Dusky pink petal powder
- Strand of dried spaghetti
Step 1
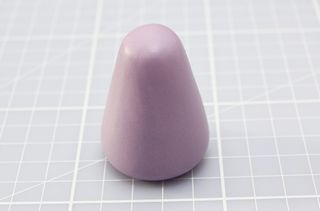
For the body: Roll 35g of purple paste into a pear shape. Roll a ball first, then roll one end slightly and smooth with the tips of your fingers.
Step 2
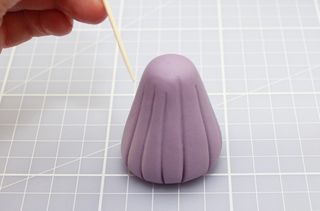
Add lines into the paste with a cocktail stick or pin tool.
Step 3
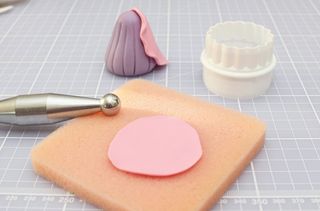
Using the 48mm circle cutter on the plain side, cut 2 circles from the pink modelling paste. Thin one edge of the circle with a ball tool or your fingers and stick onto the body, arranging the thinned edge into waves.
Step 4
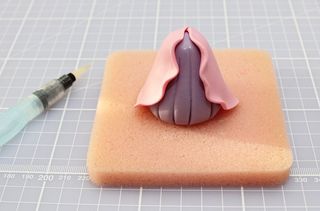
Repeat with the second circle and stick onto the body with a brush of water.
GoodtoKnow Newsletter
Parenting advice, hot topics, best buys and family finance tips delivered straight to your inbox.
Step 5
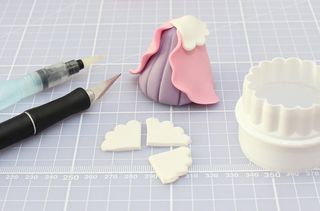
Using the same cutter, on the scalloped side, cut one scalloped circle and then cut into quarters, sticking 2 quarters onto the waist of the dress. Cover the join with a bow by using a tiny decorations mould or some extra sprinkles.
Step 6
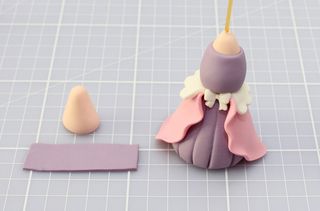
Using 5g of skin tone paste, make a small cone shape in the same way as the body, roll and cut a purple rectangle of purple paste and wrap around the body, making a neat join at the back. Smooth with your fingers and with a brush of water stick to the base of the dress. Add a length of dried spaghetti to hold it all in place.
Step 7
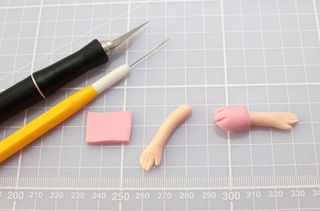
For the arms: Using 5g of skin tone paste, roll a long thin sausage shape for the arms and cut diagonally in half.
For the hands: Press the uncut end of the arms flat and cut a small triangle out for the thumb, then cut three small lines for the fingers. For the sleeves, cut little squares and wrap them around the tops of the arms. Using a cocktail stick, add lines at the top of the sleeve to make them looked puffed.
Step 8
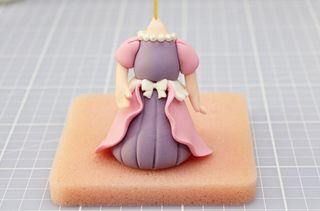
Stick them to the body with a brush of water. Add small ball sprinkles to make her necklace.
Step 9
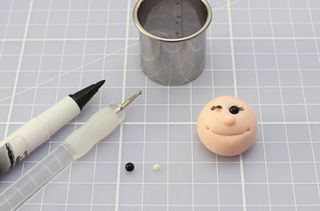
For the head: Roll the remainder of the skin tone paste, reserving a tiny ball for the nose. Add a smile using the edge of a cookie cutter and dimples with the small ball tool or cocktail stick. Add the nose with a brush of water.
For the eyes: Make indents and draw liner and lashes on with the edible food pen. Add the tiny white balls of paste followed by the black sugar pearls.
Step 10

Stick the head to the body with a brush of water and dust the cheeks with a touch of petal dust- you can use a touch of dust and white alcohol to paint the fingernails too.
Step 11
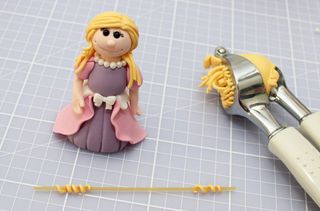
For the hair: Add the yellow paste to a garlic crusher and push through until you have a strand long enough to stick onto the head. If you are having trouble pushing the paste through, dunk it into a cup of warm water and knead again. Cut strands and stick them on with a brush of water.
You can make curls by wrapping strands around a piece of dried spaghetti and leaving to dry into place, before adding to the head. Cover the head from the front to the back, then added the bottom curled sections last.
Step 12
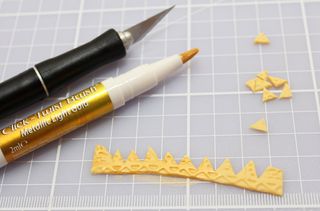
For the crown: Emboss the remainder of the yellow paste and cut a crown by cutting triangles from a long rectangle. Paint with the gold food colour pen and stick the two ends together. Stick the crown on to the princess’s head with a brush of water. Brush the edges of the pink skirt, bow and waist band with the pearl food colour brush.
Step 13
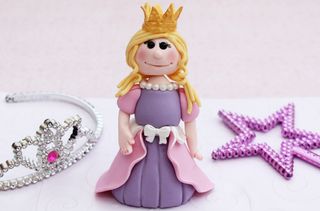
Add the finished topper to your cake.

Victoria Threader is 'the queen of cupcakes' and a contributing Recipe Writer at GoodTo. Not only can she bake delicious cupcakes, she can decorate them too - with each of Victoria’s cupcakes topped with handmade edible toppers. Some of her most popular cupcakes include: rainbow cupcakes, hidden shape cupcakes and even giant cupcakes.