

This Christmas cake will look really impressive on the dinner table and is well worth the effort. Follow this step-by-step recipe.
This Christmas cake will look really impressive - it's well worth the effort. Follow this step-by-step recipe from Woman's Weekly.
snow-much-fun-cake-1
Cut about 4cm (1½in) off one side of the cake. Cut this piece in half widthways, and then cut one piece slightly shorter.
Spread apricot glaze over cut surfaces and place the longer piece back against the main cake and the shorter one at an angle on top. Discard (or eat!) the smallest cut-off piece.
snow-much-fun-cake-2

Place cake on cake drum and cover cake with apricot glaze or jam, marzipan and sugarpaste, pressing the marzipan and sugar paste well into the steps of the cake to define the ridges.
Reserve the excess sugar paste for the figures.
snow-much-fun-cake-3

To make snowman, snowballs and figures, you’ll need 2tsp CMC to 500g white sugarpaste; knead until blended.
For snowman, make a pear-shaped body from a ball of sugarpaste. Roll another for the head, slicing top off so hat sits well. For arms, roll 2 sausages. Stick pieces together with water.
snow-much-fun-cake-4

Paint face on the snowman, using the Liquorice food colouring diluted with rose water.
snow-much-fun-cake-5

For snowman’s top hat and buttons, colour some of the sugarpaste Egg Yellow; shape three small balls for buttons. Roll out some of the paste for hat brim, and cutout, using the circular cutter. Finally, take a piece of sugarpaste for the hat, make a pear shape, and press the larger end on to a table to flatten and shape. With your fingers, pinch upper edge of hat to create the desired effect.
Colour some sugarpaste Bitter Lemon for the boy’s mittens and snowman’s scarf. Roll out thinly and cut a length for scarf. Wrap round snowman’s neck. To finish the snowman, make a cone shape for his nose from some sugarpaste coloured Tangerine (make enough to use for girl’s body and boy’s hair).
snow-much-fun-cake-6

Shape about 20 small balls in white sugarpaste for snowballs.
For the bucket, roll out some white sugarpaste and cut in a strip, slicing edges diagonally. Join with cooled, boiled water. Make a handle by rolling a very thin sausage.
Shape two small, round, flattened balls for handle supports. Stick supports and handle with a little royal icing. Colour bucket using drops of rose water mixed with silver-effect dust. Fill bucket with snowballs.
snow-much-fun-cake-7

For children, colour some paste Flesh for their heads. Roll a ball and pinch out for neck. Take a paintbrush and roll this about a quarter of the way down to position eyes.
With a toothpick, mark position of nose. Use a sharp, pointed knife to create a mouth wide enough to place a small piece of white inside the mouth for teeth.
snow-much-fun-cake-8

For eyes, make 2 tiny white sugarpaste balls and flatten between your fingers, then make 2 even smaller balls in Liquorice-coloured sugarpaste and flatten for pupils. To add movement to eyes, paint spots of white onto pupils, if liked.
Make a cone shape for a nose and, using a toothpick, mark nostrils. Make ears. Dust cheekbones and lips with Plum dust colour mixed with a little cornflour. Paint freckles, if you like.
snow-much-fun-cake-9

For the girl’s jeans, roll out some white sugarpaste into a sausage 21cm (8½in) long. Run an impression tool along the sides to represent the stitching on jeans. Fold the paste in half and create folds in the jeans with a toothpick.
snow-much-fun-cake-10

Dust the jeans sparingly with Ocean Blue mixed with cornflour.
snow-much-fun-cake-11

For the girl’s jacket, take the sugarpaste coloured Tangerine - pinch off a small piece for jacket’s arms, hood and toggles, and the boy’s hair. With the remainder, make a square shape, tapered for the shoulders. Take the toothpick to mark creases on jacket. With a sharp knife, make an opening for the jacket. Place 4 toggles along the front.
For hood, use cutter to cut out a circle of paste, and remove a section. When realigning the section, it will create the hood. Make 2 sausages for arms and indent them on one end to take hands. Again, create creases in sleeves with toothpick.
For gloves, colour sugarpaste Liquorice. Create a pear shape and make 4 incisions with nail scissors. Roll each digit between your fingers to elongate and shape for gloves. Create movement to the digits using royal icing, insert hands into indents, and place a snowball in each gloved hand.
The boy is assembled in the same way as the girl but with Christmas Red for his jacket. Use Navy-coloured sugarpaste for his jeans, and make a navy scarf from a long, rolled-out rectangular piece. Make his shoes from Licorice-coloured paste and mittens from Bitter Lemon-coloured paste.
snow-much-fun-cake-12

For the girl’s boots, colour some sugarpaste Spruce Green. Mark tread impressions on the sole of the boot with a sharp knife.
Make the hats by cutting out circles from Rose-coloured sugarpaste (for the girl),and Party Green-coloured (for the boy), removing a wedge and shaping with fingers. Remember to add boy’s Tangerine-coloured hair before placing on his hat.
The spade is made up by rolling white sugar paste in a sausage shape for the handle. Then cut a square from it for the spade head and place over the handle. Paint the handle with Dark Brown paste colours and the spade head with silver dust.
snow-much-fun-cake-13

Make up royal icing following packet instructions. Using a spatula, cover the cake with the royal icing, lifting the spatula in order to give a snowy effect.
Make sure you put all the figures in place before the icing sets. Add a few extra snowballs to the scene, too.
-
 Compromising may be killing your relationship - here are 5 ways to reach healthy compromises, according to relationship expert
Compromising isn't always the best way to keep the peace in a relationship
-
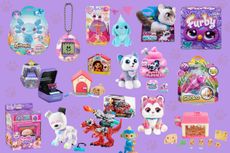 Best interactive pets for kids: 15 gift ideas for children of all ages
From puppies to axolotls, take a look at our selection of the best interactive pets you can buy that are sure to be a hit with little animal lovers

