Polka dot cake
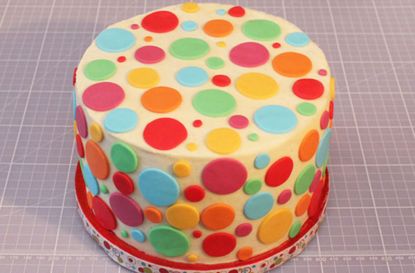

This impressive polka dot cake would make the perfect birthday or celebration cake. It's much easier to make than you may think (you could even get the children to help) with colourful polka dots hidden carefully in the sponge. The kids are going to love it!
Learn how to make your own with our simple step-by-step recipe.
This cake will take about 3-4hrs to make and needs time to set so make sure you make it the day or well before you'd like to serve it so you have plenty of time for it to set.
You could use a theme of different colours - we've gone for rainbow but try different shades of blue or pink for a baby shower, green, red and white for Christmas or yellow and pink for Easter.
Ingredients
For the cake pops:
- 150g self-raising flour
- 150g butter
- 150g golden caster sugar
- 1tsp vanilla bean extract
- 3 eggs
- 2tbsp milk
- various food colour pastes
For the cake:
- 315g self-raising flour
- 315g butter
- 315g golden caster sugar
- 5 eggs
- 1tsp vanilla bean extract
For the buttercream:
GoodtoKnow Newsletter
Parenting advice, hot topics, best buys and family finance tips delivered straight to your inbox.
- 250g butter
- 450g icing sugar
- 3tbsp hot water
- ½ jar of jam (for filling)
For polka dots:
- 50g fondant
- 50g modelling paste
- various food colour pastes
Step 1
Prepare your cake board by sticking your chosen tape around the rim of the board. Leave to one side.
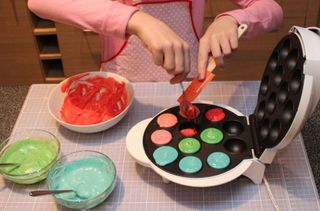
Make up the cake pop batter by mixing all the ingredients together in a large mixing bowl with an electric hand whisk until combined and divide into 6 bowls (98g in each bowl). Add the colour and mix until you have all 6 bright colours. Then add the coloured batter to your cake pop making machine and cook your cake pops accordingly. Victoria made 36 balls using the cake pop making machine method. If you don't have a cake pop making machine, try making mini cupcakes and trimming them with clean scissors to make a rounder shape.
Step 2
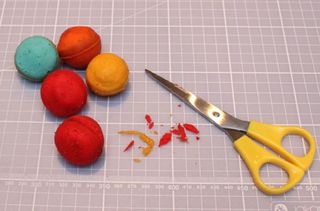
Once your cake pops have been made and left to cool for a while, trim your cake pops with a pair of scissors to make them neat and round. Leave to one side.
Step 3
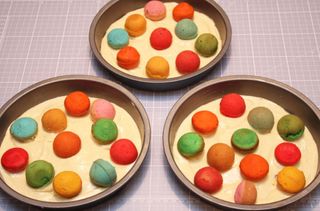
Grease your 3 x 7inch cake tins and line with greaseproof paper. Make up your cake mixture by adding all the ingredients into a large mixing bowl and whisking with an electric hand whisk until combined. Add some of the mixture to line the base of the tin. Add the cake balls.
Step 4
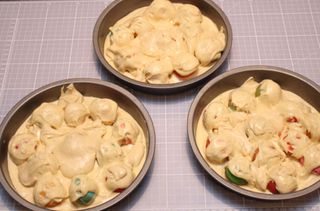
Cover the cake balls with the rest of the mixture, making sure you have an even amount of mixture in each cake tin. Don’t worry if the cake doesn't completely cover the tops of the cake balls, you won’t notice that when the cake has been put together.
Bake for 35 mins at 160°C/gas mark 3.
Step 5
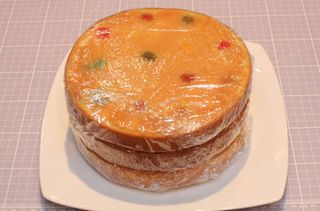
When the cakes are cool, wrap the cakes individually in cling film and pop them in the freezer for 1 hours.
Step 6
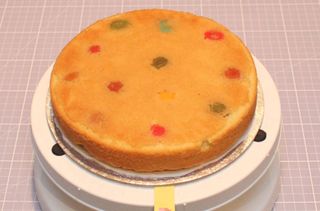
Once your cake is ready to be decorated, make up your buttercream by beating all of the ingredients together with a wooden spoon or electric hand whisk.
Pop some of the buttercream onto the cake board to secure the cake in place. Place the cakes bottom side up as it's easier to add the jam and buttercream that way. Put the cake board onto a turn table, as this will make it easier to decorate your cake with buttercream. Add jam and buttercream to the first layer of your cake, pop the next cake on top and repeat until you have a secure stack of three. Victoria also added a tab so she could tell where the first cut on the cake should be to show off the best polka dot balls inside.
Step 7
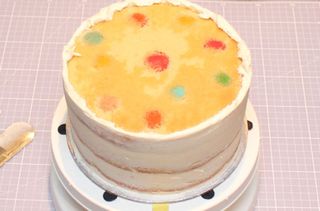
Add the first layer of buttercream to the outside of the cake with a large palette knife, removing the excess with the fondant smoother. Once the sides are covered, pop in the fridge for 30 minutes.
Remove the cake from the fridge and add another layer, making sure you leave the lip at the top of the cake. Chill for another 30 minutes.
Step 8
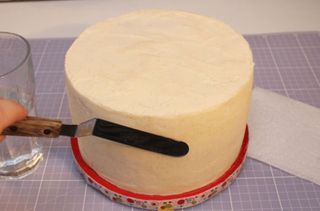
Now fill in the top and chill for 30 mins. The chilled buttercream lip at the top of the cake will help you get the buttercream flat on the top. Don’t worry about any imperfections at this stage.
Once the cake has chilled, you can then smooth any imperfections. Using some boiling water, dip a small palette knife in to heat it up, wipe the knife on some kitchen towel and then smooth the knife over and lumps or bumps. You can press quite firmly to melt the lines away.
Step 9
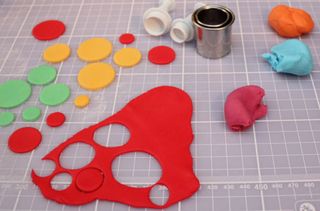
Mix the fondant and modelling paste together and divide into 5 and colour to your desired colours. Use various circle cutters to cut the circles out. If anything sticks, dust your counter and your cutters with a little cornflour. The longer you leave these to dry the better as then the circles are easier to pick up.
Step 10
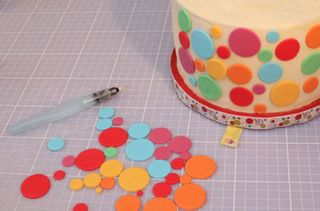
Using a water pen, glue the dot to the cake until you have completely covered the cake.
Step 11
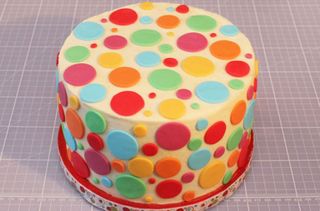
Your cake is now ready to serve.
Step 12
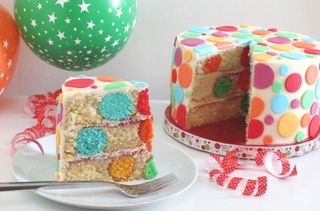
Cut your cake to reveal it's impressive polka dot patterned insides.

Jessica Dady is Food Editor at GoodtoKnow and has over 11 years of experience as a digital editor, specialising in all things food, recipes, and SEO. From the must-buy seasonal food hampers and advent calendars for Christmas to the family-friendly air fryers that’ll make dinner time a breeze, Jessica loves trying and testing various food products to find the best of the best for the busy parents among us. Over the years of working with GoodtoKnow, Jessica has had the privilege of working alongside Future’s Test Kitchen to create exclusive videos - as well as writing, testing, and shooting her own recipes. When she’s not embracing the great outdoors with her family at the weekends, Jessica enjoys baking up a storm in the kitchen with her favourite bakes being chocolate chip cookies, cupcakes, and a tray of gooey chocolate brownies.