Elf cake decoration
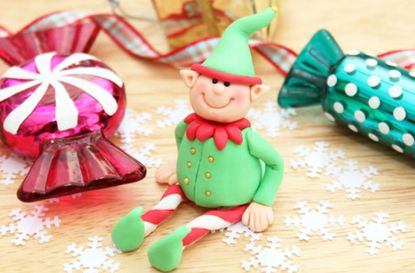

We can't get over how cute these cheeky little chappies are. Why not make them to help out Santa as a Christmas cake decoration?
They won't take as long as you think and will last well if kept in a breathable box.
This is a handy guide to use to make other people too, simply redesign their clothes, add some hair and leave off those elvish ears!
By Victoria Threader
Ingredients
- 10g white modelling paste
- 7g green modelling paste
- 5g red modelling paste
- 5g skin tone modelling paste
- Gold ball sprinkles (nonpareil), for the buttons and bell at the end of the hat
- Black ball sprinkles (nonpareil), for the eyes
Step 1
For the legs: Using 10g of red and white modelling paste, roll two long thin sausages and twist them together. Once evenly twisted, roll on the counter until you have a smooth stripy sausage. Cut to size (about 6cm) and bend in the centre.
For the shoes: Roll small balls of green modelling paste, pulling one edge to a point, curling it over at the tip. Use a ball tool or the end of a teaspoon handle to make an indent for the shoes.
Step 2
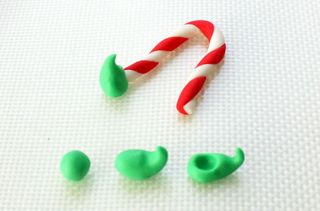
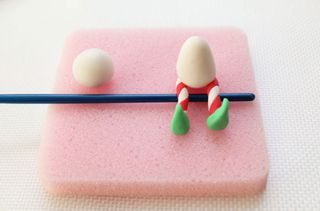
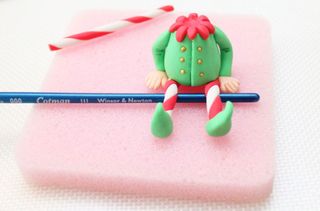
Stick the feet to the end of the legs with a brush of water. Lay the legs over a teaspoon, or something similar, so the legs dry in a bend.
For the body: take about 5g of white modelling paste for each body and roll it into a ball. Roll the top to a cone to make a pear shape.
Step 3
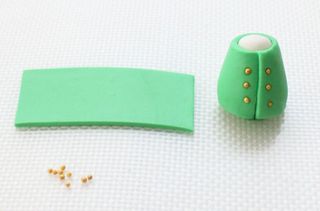
For the jacket: Roll a strip of green modelling paste wide enough to fit the body, wrap it around and cut to meet at the front.
For the buttons: Put a dot of water where you want them to go and then push the gold sprinkles into the paste. Stick the body to the legs with a brush of water.
GoodtoKnow Newsletter
Parenting advice, hot topics, best buys and family finance tips delivered straight to your inbox.
Step 4
For the ruffle: Cut a daisy from the red modelling paste and stick it to the top of the body. Push a piece of dried spaghetti down onto the body to hold the head on.
Step 5

For the arms and hands: Roll a sausage for the arm, cutting diagonally in the centre (so they fit well to the body) and trimming the ends. Bend slightly in the middle and add 3 indents with a cocktail stick in the centre of the arms.
For the hands: Roll small balls of skin tone paste, roll one edge for a wrist, then squash the ball end flat with your finger. Cut a triangle between the thumb and the fingers and then cut 4 fingers with a sharp knife. Roll the ends of the finger between your thumb and forefinger to smooth and even them out.
Step 6
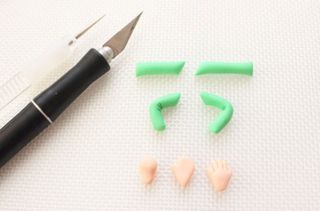
With a brush of water, stick the arms to body adding a brush of water to the ends of the arms too so you can stick the hands on.
Step 7
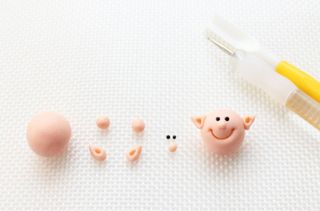
For the head: Roll a small ball of skin tone paste, 2 tiny balls for the ears and an even small one for the nose. Pinch the balls for the ears to a point and indent with a tiny ball tool, stick them to the side of the head with a tiny brush of water. Add the black sprinkle balls for the eyes and nose. Use a smile tool or cocktail stick to add the smile, indenting the end with a tiny ball tool if you have one.
Step 8
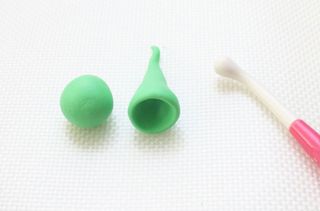
For the hat: Roll a ball of green paste and make a hole using a ball tool or teaspoon handle.
Step 9
Stick the head onto the dried spaghetti and then add the hat using a brush of water to stick it on. Roll a little leftover piece of the red paste to make a rim for the hat.
Step 10
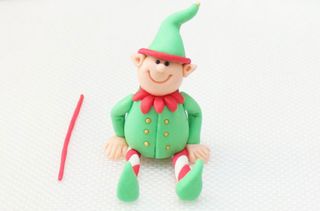
Add cheeks, if you wish, with a brush of dusky pink petal dust.
Step 11
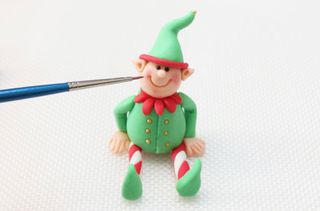
Add the finished topper to a cake of your choice.

Victoria Threader is 'the queen of cupcakes' and a contributing Recipe Writer at GoodTo. Not only can she bake delicious cupcakes, she can decorate them too - with each of Victoria’s cupcakes topped with handmade edible toppers. Some of her most popular cupcakes include: rainbow cupcakes, hidden shape cupcakes and even giant cupcakes.